Table of Contents
Incoming mail received from senders listed in the Allow list will always be allowed, regardless of the message classification. In the Control panel, select Incoming – Protection Settings > Sender Allow list.
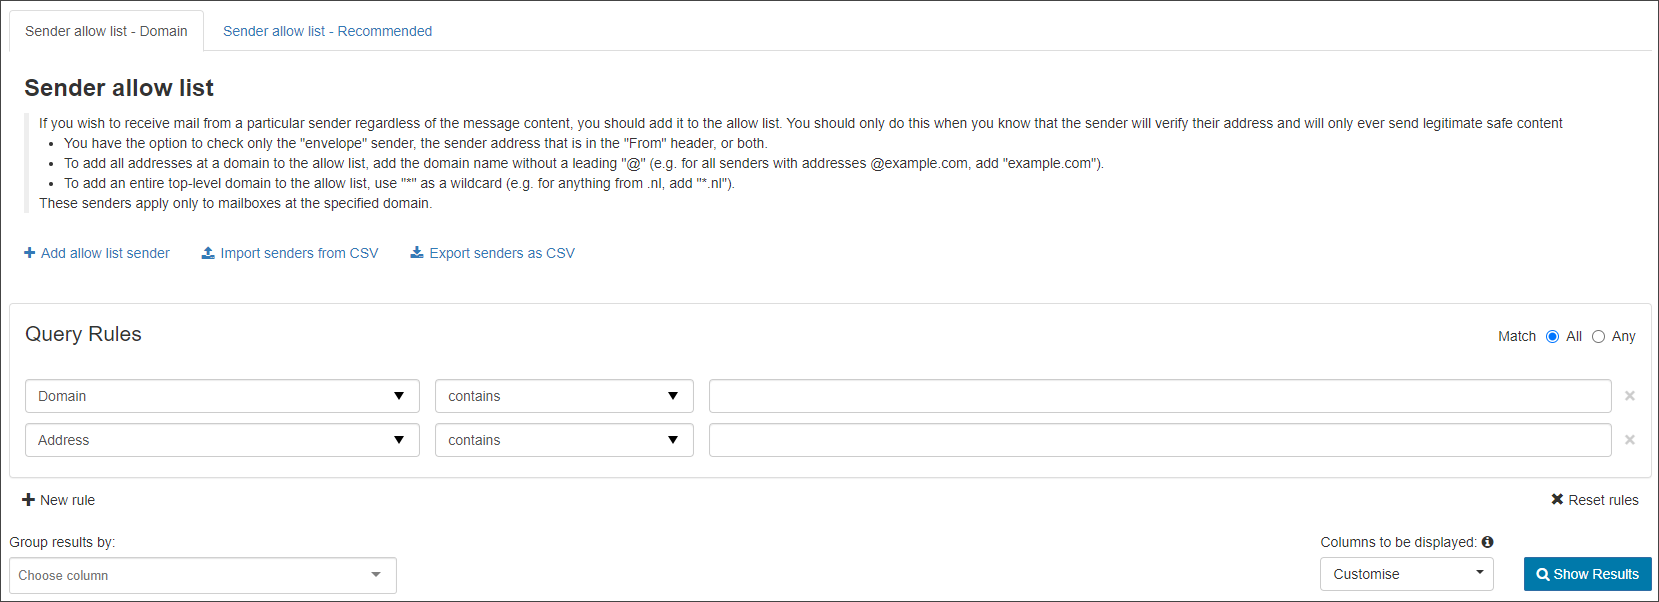
There are up to two tabs displayed:
- Sender Allow list – Domain -This tab allows you to manage the allowed sender list for mailboxes at specific domains. On this tab you can:
- Add Allow list sender – Add a sender to the Allow list for a specific domain. See Add Allow list sender – Domain tab
- Import senders from CSV – Import a list of senders to add to the Allow list for a specific domain via CSV file
- Export senders as CSV – Export the list of senders to a CSV file
- Sender Allow list – Recommended/Inherited – This tab allows you to view any inherited allowed senders that have been applied by a higher level admin
Add Sender to Allow list
- Click on Add Allow list sender to open the dialog:
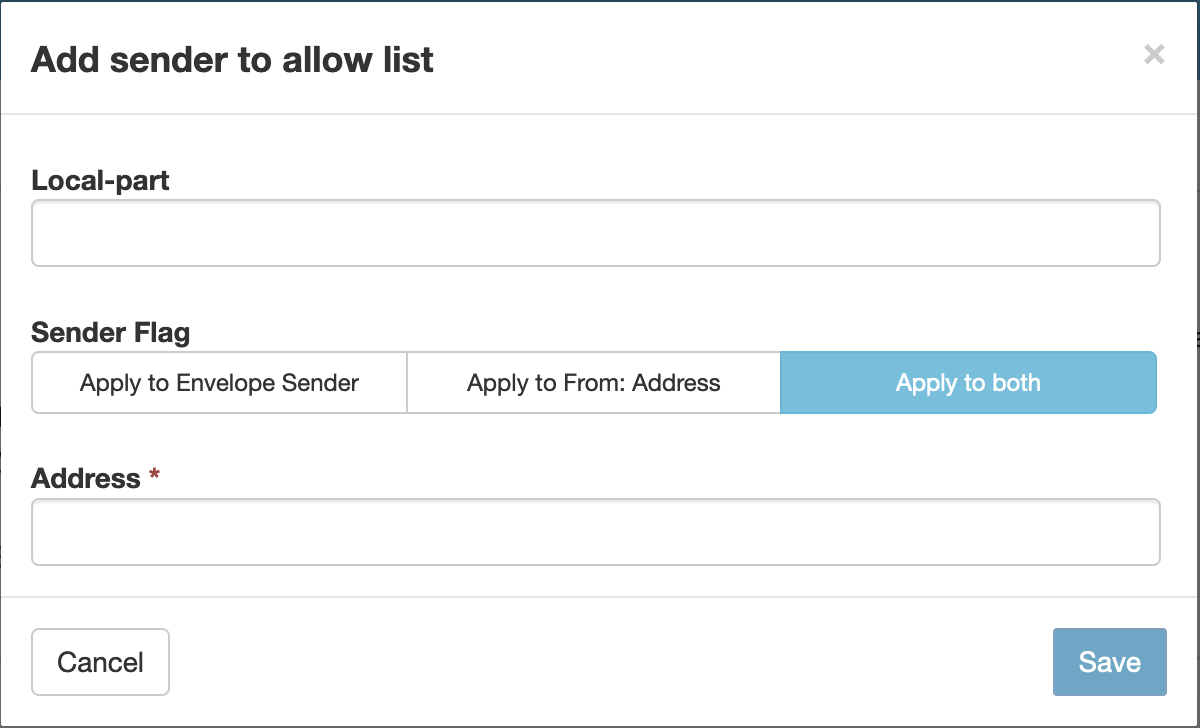
- In the Local-part field, specify the local-part of the recipient address at the domain or leave blank to apply to the whole domain
To apply the entry to [email protected], only enter user1 in the local part. To apply to all users at the domain, leave this box blank.
- Choose which address you want to apply by selecting from the following Sender Flags:
- Apply to Envelope Sender – The SMTP Envelope sender from address only
- Apply to From: Address – The MIME message header from address only
- Apply to both – both the SMTP Envelope sender from address and the MIME message header from address
- In the Address field, enter the email address of the sender you want to allow
To add a whole domain to the sender Allow list, enter the domain in the format: domain-to-allowlist.invalid. There is no need to include a wildcard or the @ of the address.
- Click on Save to add the sender